
How to Install a Performance Exhaust: 2026 Tips

Last Updated: November 17, 2026
Quick Summary
Installing a performance exhaust starts with confirming fitment and laying out tools, then supporting the car on jack stands and the old system on a jack. Expect one to three hours for an axle-back and two to four hours for a cat-back, tightening from front to rear and re-torquing after the first heat cycle.
- Axle-back systems replace only the rear muffler and tip and are the simplest to install.
- Missing hardware is the number one reason installs stall halfway, so open every box first.
- Aim for at least a finger's width of clearance at the tightest points to avoid rattles.
- Tighten from the front of the car toward the rear so each joint settles against the one ahead.
- Drone is a low-frequency resonance usually in the 1,800 to 2,500 rpm range, not volume.
Table of Contents
- Choosing the Right Performance Exhaust System
- Cat-Back Exhaust Installation: What Changes on Your Car
- Performance Exhaust Tools and Parts Layout
- Performance Exhaust Installation Time and Cost Breakdown
- Step-by-Step: Removing the Factory Exhaust and Fitting the New System
- Exhaust Leak After Installation: Troubleshooting Leaks, Rattles, and Drone
- Sound, Emissions, and Warranty: What to Expect
- Search Our Store for the Right Exhaust for Your Build
- Frequently Asked Questions
Choosing the Right Performance Exhaust System
Bolting on a performance exhaust is one of the most satisfying upgrades you can make, and getting the right performance exhaust installation tips in 2026 starts long before you pick up a wrench.
A performance exhaust is the complete system that carries burnt gases from the engine to the tailpipe, and the parts you choose determine tone, flow, and how hard the install will be.
Here's the good news: once you understand the three main system types and check your fitment, the rest of the job is straightforward.
Cat-Back, Axle-Back, or Turbo-Back
Cat-back systems replace everything from the catalytic converter rearward: piping, muffler, and tips. They're the most popular choice for a daily driver because they balance sound, flow, and cost.
Axle-back systems swap only the rear muffler and tailpipe. A good example is the PLM Axle Back Exhaust with Dual Tips for the 2022+ BRZ and GR86, a direct bolt-on exhaust for those platforms.
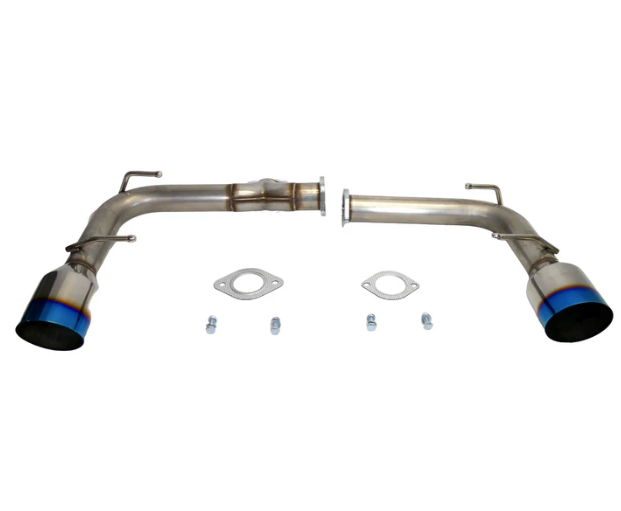
Turbo-back systems replace the downpipe and everything behind it. They offer the biggest performance gains but demand more work and often a tune.
| System | What It Replaces | Install Difficulty | Best For |
|---|---|---|---|
| Axle-back | Rear muffler and tip | Low | Budget, easy DIY |
| Cat-back | Mid-pipe, muffler, tips | Medium | Daily drivers, balanced gains |
| Turbo-back | Downpipe and full system | High | Big power, tuned builds |
Fitment and Compatibility Checks Before You Buy
Fitment is where most returns come from, so check these before you order:
- Confirm your exact year, model, and trim
- Check if your car has active exhaust valves
- Note your rear bumper cutout shape and tip spacing
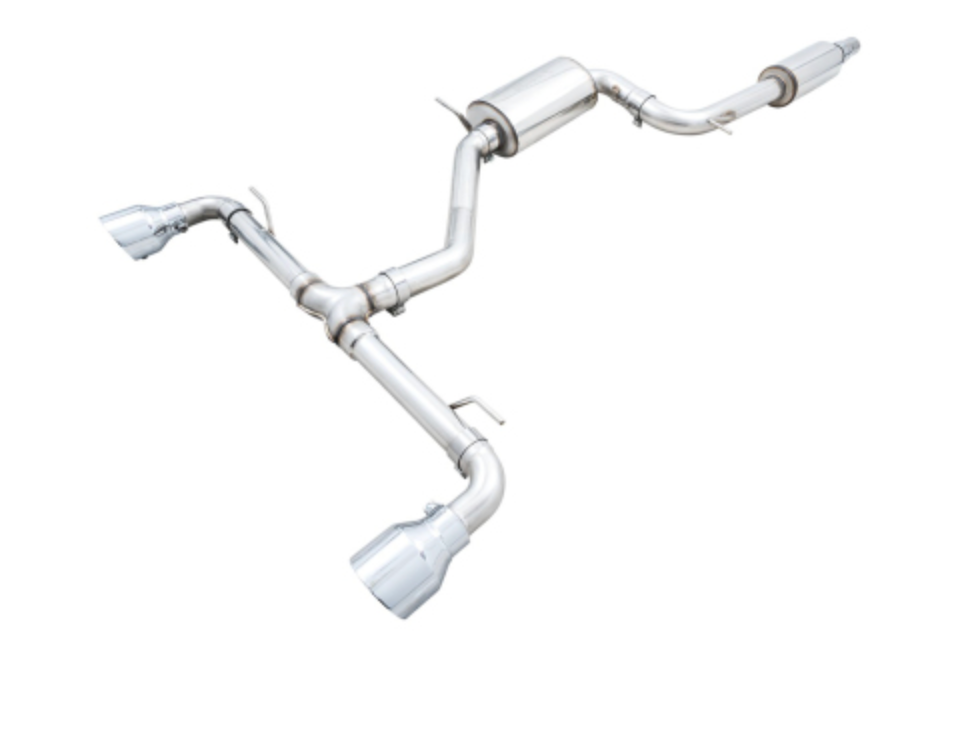
When you're ready to compare a real cat-back option, the AWE Touring Edition Exhaust for the 2022 VW GTI MK8 is a complete exhaust kit with adjustable tips and drone-canceling 180 Technology.
Cat-Back Exhaust Installation: What Changes on Your Car
A cat-back exhaust installation changes three things: sound, flow, and weight. The tone gets deeper, the piping flows better, and the stock muffler often weighs more than the replacement.
Performance Exhaust Tools and Parts Layout
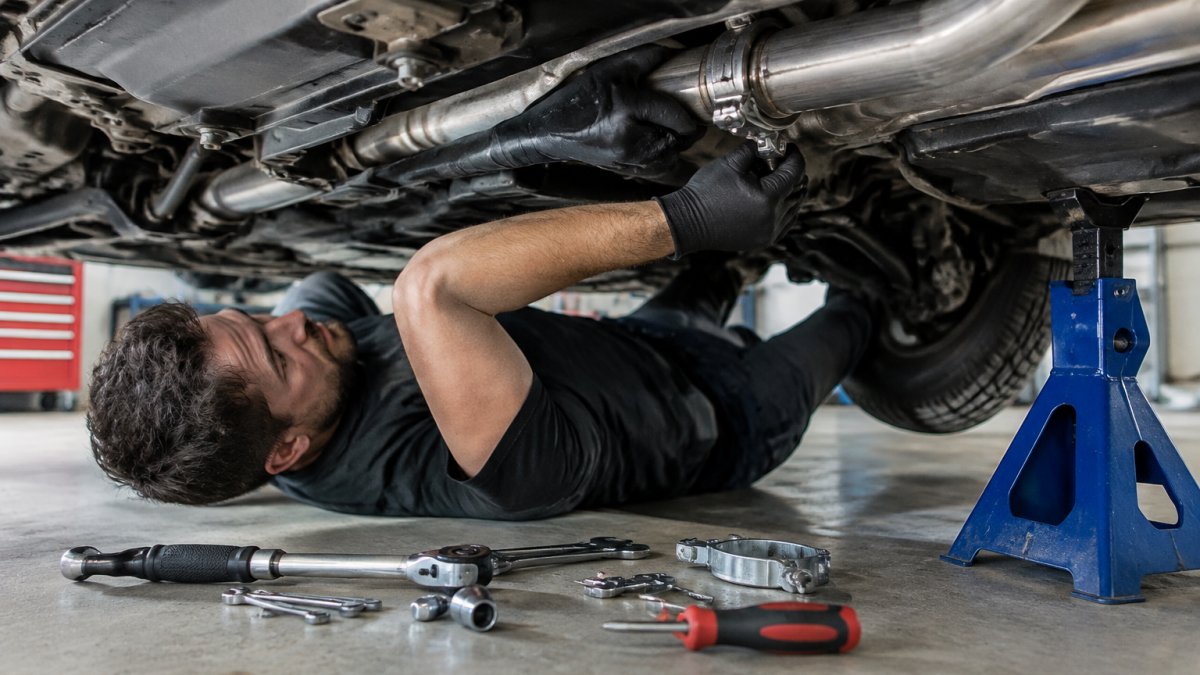
Lay out your performance exhaust tools before you lift the car. A clean layout saves time and stops you crawling out from under the car every five minutes.
Tools you'll need:
- Jack and jack stands or ramps
- Socket set and combination wrenches
- Penetrating oil for rusty bolts
Parts to confirm:
- New gaskets and clamps
- Hangers and rubber isolators
- All bolts and hardware
Watch out: missing hardware is the number one reason installs stall halfway. Open every box and match parts to the diagram before you start.
Performance Exhaust Installation Time and Cost Breakdown
Performance exhaust installation time runs about one to three hours for an axle-back and two to four hours for a cat-back on jack stands. A shop with a lift will be faster.
Cost splits into two parts: the system itself and the labor if you don't do it yourself. Catalog pricing varies by system; the AWE 2022 VW GTI MK8 Touring Edition Exhaust is listed at $1,395.00 and the APR 22-26 Audi RS3 (8Y) Catback Exhaust System at $2,029.46. Axle-back options cost far less.
| Job | DIY Time | Shop Time |
|---|---|---|
| Axle-back | 1-2 hours | 1 hour |
| Cat-back | 2-4 hours | 1-2 hours |
| Turbo-back | 4-6 hours | 3-4 hours |
DIY Time
Step-by-Step: Removing the Factory Exhaust and Fitting the New System
This is the core of any performance exhaust installation, and it is where most DIY jobs either succeed cleanly or develop leaks and rattles later. Work on a cold car, wear eye protection, and never rely on a jack alone to hold the vehicle. The sequence below is written for a cat-back or axle-back on jack stands; a turbo-back adds downpipe work at the front and should be treated as a longer job.
Lifting and Supporting the Car Safely
- Park on level, solid ground and chock the front wheels.
- Lift at the manufacturer's designated jack points, not on the exhaust, fuel lines, or rocker panels.
- Set jack stands under the frame rails or subframe and lower the jack so the stands carry the weight.
- Give the car a firm shove before you go under it. If it moves, reset the stands.
- Keep a second jack under the exhaust system before you loosen anything, so the factory system does not drop on you.
Watch out: exhaust components get hot and stay hot for a long time. Confirm the car has cooled completely before you touch the system, and keep flammable materials away from the work area.
Removing the Factory Exhaust
- Spray penetrating oil on the flange bolts, clamps, and hanger studs and let it sit for several minutes.
- Support the exhaust with a jack or transmission stand before loosening any fastener.
- Unbolt the flange or clamp at the connection point, working from the rear of the car forward so the system stays supported as it comes apart.
- Release the rubber hangers one at a time with an exhaust hanger removal tool. A dab of silicone spray on the hanger studs helps them slide out without tearing.
- Lower the factory exhaust slowly and set it aside. Keep the factory hardware; some kits reuse the factory hangers and isolators.
Watch out: rusty flange bolts snap easily. If a bolt will not break loose after penetrating oil, apply heat carefully and keep a fire extinguisher within reach, or stop and let a shop handle it.
Test-Fitting Before Final Assembly
Before you tighten anything, do a dry fit. Slide the new system into place, hang it loosely on the hangers, and check three things: tip alignment in the bumper cutouts, clearance to the subframe, fuel lines, and rear bumper, and whether the mid-pipe sits at the same angle as the factory piece.
Assembling, Aligning, and Torquing the Replacement
- Hang the new system loosely on the hangers. Do not tighten the hanger clamps yet.
- Fit new gaskets and clamps at every joint, but leave everything finger-tight so the system can move into alignment.
- Check clearance around the bumper, subframe, fuel lines, and any heat shields. Aim for at least a finger's width of clearance at the tightest points; less than that invites rattles once the system heat-cycles.
- Align the tips evenly in the cutouts, matching left-to-right height and depth. Adjust the hanger rods or slip joints until the tips sit level.
- Tighten from the front of the car toward the rear. This sequence lets each joint settle against the one ahead of it and reduces the chance of a stressed, leaking connection.
- Torque clamps and flange bolts to the spec in your instructions. If the kit does not list a spec, a common pattern is to snug the clamp, then torque in small increments while checking that the pipe has not rotated. Recheck all fasteners after a test drive and again after the first heat cycle.
Watch out: over-tightening clamps crushes piping and causes leaks, while under-tightening lets joints slip and rattle. Snug, then torque in sequence, and recheck after the system has gone through a full heat cycle.
Post-Installation Checks
Start the car and listen at idle, then blip the throttle. Look for hissing or ticking at each joint, watch for the tips shifting under load, and check that no pipe contacts the body or subframe. A short test drive followed by a re-torque catches most issues before they become leaks.
Exhaust Leak After Installation: Troubleshooting Leaks, Rattles, and Drone
An exhaust leak after installation usually traces to a loose clamp, a misaligned flange, a missing or crushed gasket, or a joint that was tightened before the system settled. The goal of this section is to help you diagnose by symptom rather than guess, because the fix for a leak is different from the fix for a rattle, and drone is often a seating problem rather than a defect.
Locating a Leak
A leak typically shows up as a hiss or tick at idle that gets louder under load, or as a puff of exhaust visible at a joint when the engine is cold.
Once you find the source, recheck the clamp and flange torque, confirm the gasket is present and not crushed, and confirm the pipes are fully seated in the joint before tightening.
Fixing Rattles
A rattle usually means metal-to-metal contact: a pipe touching the subframe, a heat shield, the rear bumper, or a worn or stretched rubber hanger. Push and pull the system gently by hand with the car safely supported and listen for where contact occurs. Common fixes are to adjust the hanger rods, replace a stretched isolator, or add clearance at the tightest point.
Diagnosing Drone
Drone is a low-frequency resonance at cruising speed, usually in the 1,800 to 2,500 rpm range, and it is different from volume. Before blaming the system, confirm it is seated correctly: a pipe that is not fully inserted or a hanger that is preloaded can transmit vibration into the cabin. Some systems include drone-canceling resonators by design, and a system that drones after installation may simply need the joints loosened, re-aligned, and re-torqued in sequence.
Re-Torquing After the First Heat Cycle
New exhaust systems expand and contract during the first few heat cycles, and fasteners can loosen as a result.
Watch out: if a leak persists after re-torquing and a new gasket, or if you smell exhaust in the cabin, stop driving and have the system inspected. Exhaust leaks near the cabin are a safety issue, not just a noise issue.
Sound, Emissions, and Warranty: What to Expect
Sound is subjective, but emissions and warranty are not. Check local requirements before you buy any exhaust system.
Warranty worries are common. If something does go wrong, our guide on performance parts warranty claims walks you through the step-by-step process.
Search Our Store for the Right Exhaust for Your Build
The right performance exhaust comes down to fitment, budget, and how much sound you want. Do the checks, lay out your tools, and torque in sequence, and most installs go smoothly.
If you'd rather have help choosing, our team at Axion Performance Parts offers expert support from people who actually build cars. You can also read more on how to build performance cars with expert support.
Stop guessing which system fits your build and let our team point you to the right one.
Frequently Asked Questions
How long does a performance exhaust installation take?
Plan on roughly 1 to 3 hours for a cat-back or axle-back system on a lift, and closer to 3 to 5 hours on jack stands in a driveway. Axle-back systems are the quickest because you leave the factory mid-pipe in place. Turbo-back systems take longest since you are also removing the downpipe, and rusted bolts on older cars can add an hour or more. Having all performance exhaust tools staged before you start is the biggest time saver.
What tools do you need to install a performance exhaust?
You need a socket set with extensions, a breaker bar, penetrating oil, a torque wrench, exhaust hanger pliers or a pry bar, safety glasses, and gloves. A reciprocating saw or angle grinder helps when factory clamps are seized. For performance exhaust tools, add a floor jack and four jack stands, or use a lift if you have access. Soapy water on the rubber hangers makes removal and reinstallation much easier.
How do you prevent an exhaust leak after installation?
Clean every mating surface before assembly, seat each clamp so it sits centered over the joint, and tighten in a cross pattern rather than cranking one bolt down fully. Use new gaskets and hardware rather than reusing old crush gaskets. After the first 50 to 100 miles, recheck all clamps and bolts, since heat cycles cause them to settle. If you hear a tick or hiss, a soapy water test at idle will show exactly where the exhaust leak after installation is coming from.
How much horsepower will a performance exhaust add?
A cat-back system changes sound and flow; horsepower gains depend on the vehicle and tuning, so measure with a before-and-after dyno if it matters to you. Axle-back systems are mostly a sound and appearance upgrade. Expect a deeper tone, less weight, and better flow, but treat big horsepower claims on exhaust alone with skepticism and measure with a before-and-after dyno if it matters to you.


