
9 Essential Hardware Pieces for Turbo Kit Installation

Last Updated: November 12, 2026
Quick Summary
Essential turbo kit hardware covers exhaust sealing, mounting fasteners, oil and coolant line seals, and intake connections. A complete package includes MLS manifold, turbine outlet, and downpipe gaskets, plus studs, M10 bolts, copper crush washers, banjo washers, and O-rings. Match every gasket and fastener to your engine code and turbo model before ordering.
- Sort hardware into universal items and vehicle-specific parts that must match your engine code and flange pattern.
- Multi-layer steel gaskets hold up better than composite under high heat and boost.
- Replace any stud showing stretch, thread damage, or corrosion instead of reusing it.
- Use fresh copper crush washers on both sides of every banjo fitting and torque to spec.
- Verify engine code, turbo model, flange type, thread size, and OEM part number before buying.
Table of Contents
- Why Turbo Kit Hardware Decides Whether Your Install Leaks
- The Turbo Kit Installation Checklist: What Ships in a Complete Kit
- Turbo Gaskets and Hardware: Matching the Right Seal to Each Joint
- Turbo Oil Feed and Drain Lines: Seals, Crush Washers, and Coolant Fittings
- Turbocharger Installation Tools You Need on the Bench
- Fitment Verification: Stock Replacement vs Upgraded Turbo Compatibility
- Common Mistakes: Missing Hardware, Reused Gaskets, and Loose Studs
- Pick the Right Turbo Kit Hardware for Your Build
- Frequently Asked Questions
Why Turbo Kit Hardware Decides Whether Your Install Leaks
Most turbo installs fail for a boring reason. Not tuning. Not boost pressure. Hardware.
A missing crush washer or a reused exhaust manifold gasket can turn a weekend build into a boost leak hunt that drags on for weeks. The parts that seal and fasten the turbocharger often get treated as an afterthought, and that is exactly where leaks start.
So here is the honest truth: the essential hardware for turbo kit installation matters as much as the turbo itself. This guide breaks down the gaskets, studs, O-rings, and fittings typically needed, plus how to check fitment and avoid the mistakes that sink first-time installs.
Below, we walk through a complete hardware checklist, fastener specs, oil and coolant line prep, and the post-install checks that catch problems early.
The Turbo Kit Installation Checklist: What Ships in a Complete Kit
A complete turbo kit hardware package generally covers exhaust sealing, mounting fasteners, oil and coolant line seals, and intake connections.
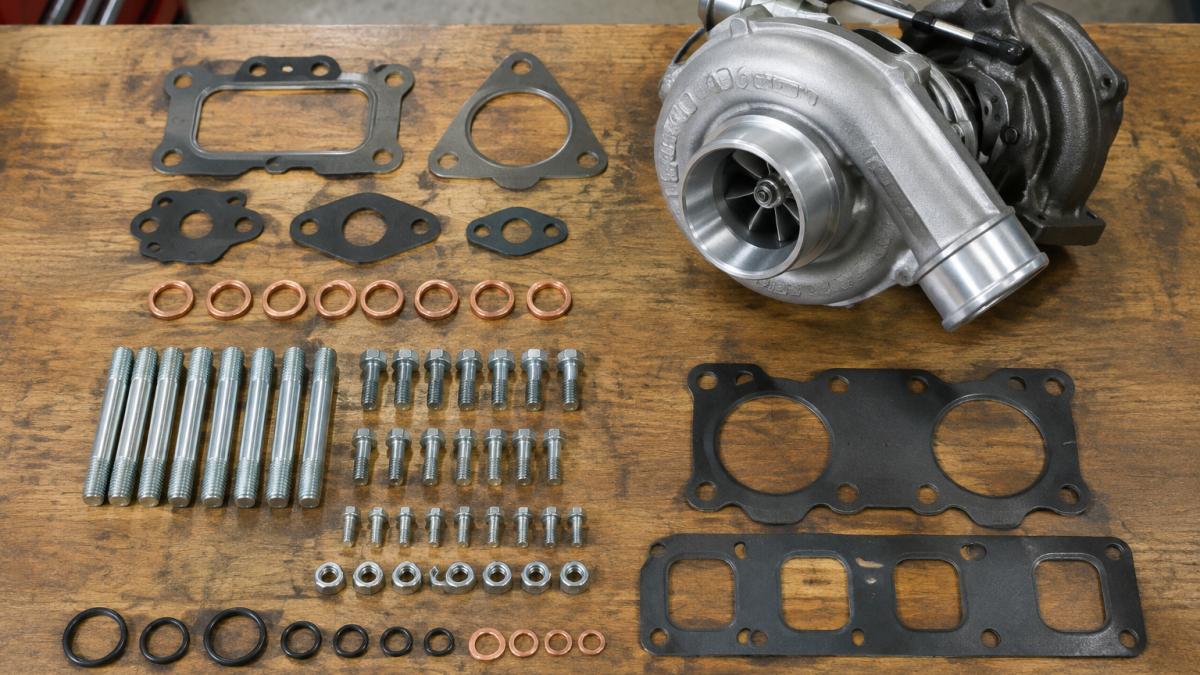
The useful way to run this checklist is to sort every item into two buckets: universal hardware that fits most turbo setups, and vehicle-specific hardware that must match your engine code, turbo model, and flange pattern. Most incomplete-kit horror stories come from assuming a universal item covers a vehicle-specific joint.
Universal hardware (fits most setups, but confirm sizes):
- Copper crush washers for oil feed banjo fittings (typically 12mm or 14mm, but verify)
- Banjo washers for coolant lines
- O-rings and sealing rings for oil drain and coolant ports
- Vacuum line clamps and caps
- Wideband O2 sensor bung plug, if unused
- Anti-seize and thread chaser (consumables, not kit contents)
Vehicle-specific hardware (must match your exact application):
- Exhaust manifold gasket, matched to port shape and engine code
- Turbine outlet gasket, matched to housing flange
- Downpipe gasket, matched to downpipe flange
- Turbo-to-manifold studs and nuts, matched to thread pitch and length
- Turbo-to-downpipe bolts, matched to flange thickness and clearance
- Oil feed line fitting and restrictor, matched to turbo inlet thread
- Oil drain gasket and bolts, matched to drain flange
- Coolant line banjo fittings, matched to port thread pitch
- Intake manifold gasket and couplers, matched to throttle body and piping diameter
A common mistake is buying a gasket set and assuming it covers fasteners. It often does not. Studs, nuts, and bolts are frequently sold separately, and the ones in a generic kit may be the wrong length or thread pitch for your manifold.
Before you order, pull the parts list for your specific engine code and turbo model and compare it line by line against the kit contents. If the kit does not list thread sizes and flange dimensions, ask the seller before you buy.
Exhaust Side: Manifold, Turbine Outlet, and Downpipe Gaskets
The exhaust side runs hottest and leaks first. Three joints matter most: the exhaust manifold to the head, the turbine housing outlet, and the downpipe connection.
Multi-layer steel (MLS) gaskets hold up better than composite under high heat and boost. For the turbine outlet, a metal outlet gasket matched to the housing flange prevents the most common boost leak. If you are upgrading the outlet on an F-150, a dedicated turbo outlet adapter with hardware kit pairs the adapter and fasteners so the joint seals correctly the first time.
Watch out: reusing a crushed MLS gasket almost always causes a leak. Once compressed, it does not spring back.
Mounting Fasteners: Studs, Nuts, and M10 Bolts
Fasteners carry the load and hold the seal. Stretched studs let the turbo walk, and a walking turbo destroys gaskets.
Most turbo-to-manifold connections use studs threaded into the manifold with nuts clamping the turbine flange. Many downpipe and bracket connections use M10 bolts, often Allen-head for tight clearance. Zinc-plated steel resists corrosion better than bare hardware.
Replace, do not reuse, any stud that shows stretch, thread damage, or corrosion. Torque in stages and in a crossing pattern to load the gasket evenly.
Turbo Gaskets and Hardware: Matching the Right Seal to Each Joint
Every joint on a turbocharger needs a specific seal, and mixing them up causes leaks. The right turbo gaskets and hardware match material and shape to each connection.
- Exhaust manifold gasket: MLS, matched to port shape
- Turbine outlet gasket: metal, matched to housing flange
- Downpipe gasket: MLS or metal ring
- Oil feed: copper crush washer
- Oil drain: fiber or MLS gasket with bolts
- Coolant lines: banjo washers or O-rings
- Intake connections: silicone couplers with clamps
For 11th Gen Civic 1.5T owners, a Civic 1.5T turbo gasket kit bundles the MLS gaskets, zinc-plated studs and bolts, and copper crush washer into one package. It is built for factory replacement or aftermarket turbo swaps.
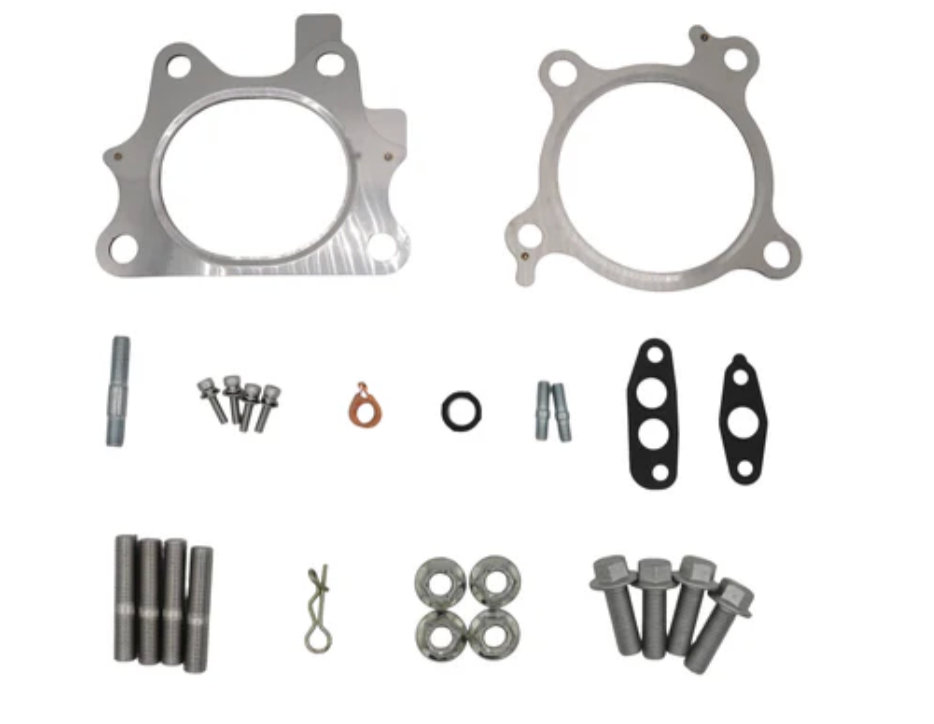
Each joint on the turbocharger takes a specific seal, so match the material and shape to the connection.
| Joint | Seal type |
|---|---|
| Exhaust manifold gasket | MLS, matched to port shape |
| Turbine outlet gasket | Metal, matched to housing flange |
| Downpipe gasket | MLS or metal ring |
| Oil feed | Copper crush washer |
| Oil drain | Fiber or MLS gasket with bolts |
| Coolant lines | Banjo washers or O-rings |
| Intake connections | Silicone couplers with clamps |
Turbo Oil Feed and Drain Lines: Seals, Crush Washers, and Coolant Fittings
Oil and coolant seals fail quietly, then fail badly. A weeping oil feed line can starve the turbo bearing; a coolant leak can cook the center housing.
Preparation matters more than the parts here. Flush the feed line before install. Any debris left in the line goes straight into the bearing. Use fresh copper crush washers on both sides of every banjo fitting, and torque to spec, not by feel.
A common mistake is over-torquing a banjo bolt to stop a drip. That crushes the washer past its seal point and makes the leak worse. If a fitting still weeps, replace the washer.
Prime the turbo with oil before first start. Crank the engine without ignition until you see oil pressure, then fire it up.
Turbocharger Installation Tools You Need on the Bench
The right turbocharger installation tools save hours and prevent damage. Line them up before the car goes on jack stands.
- Torque wrench in the correct ranges
- Socket set including Allen and Torx bits
- Flare nut wrenches for oil and coolant lines
- Gasket scraper and brake cleaner
- Thread chaser for stud holes
- Anti-seize for stud threads
- Vacuum caps and plugs
- Safety glasses and nitrile gloves
A thread chaser cleans manifold stud holes without cutting new threads, unlike a tap. Skipping this step is why so many studs cross-thread on reinstall.
Fitment Verification: Stock Replacement vs Upgraded Turbo Compatibility
Stock replacement and upgraded turbos do not always share hardware. Verify fitment before you buy, not after the box arrives.
A stock turbocharger swap usually reuses the factory flange pattern and hardware.
Step 2: Measure the flange, do not guess it. Check the bolt pattern and stud spacing on the turbine inlet and outlet. Measure the outlet shape and size.
Step 3: Confirm thread size and pitch. Oil feed and coolant ports often use banjo bolts in specific thread pitches.
Step 4: Cross-reference OEM part numbers. For stock replacement hardware, the OEM part number is the most reliable fitment check.
Step 5: Check downpipe and intercooler piping compatibility. An upgraded turbo may clock the outlet differently or change the inlet diameter, which means different couplers, clamps, and downpipe flanges.
If you are moving to an upgraded setup on an EcoBoost, a Full-Race Formline turbo kit includes the components for a 700+ HP turbo upgrade on 2017-2020 Ford F-150 and Raptor applications.
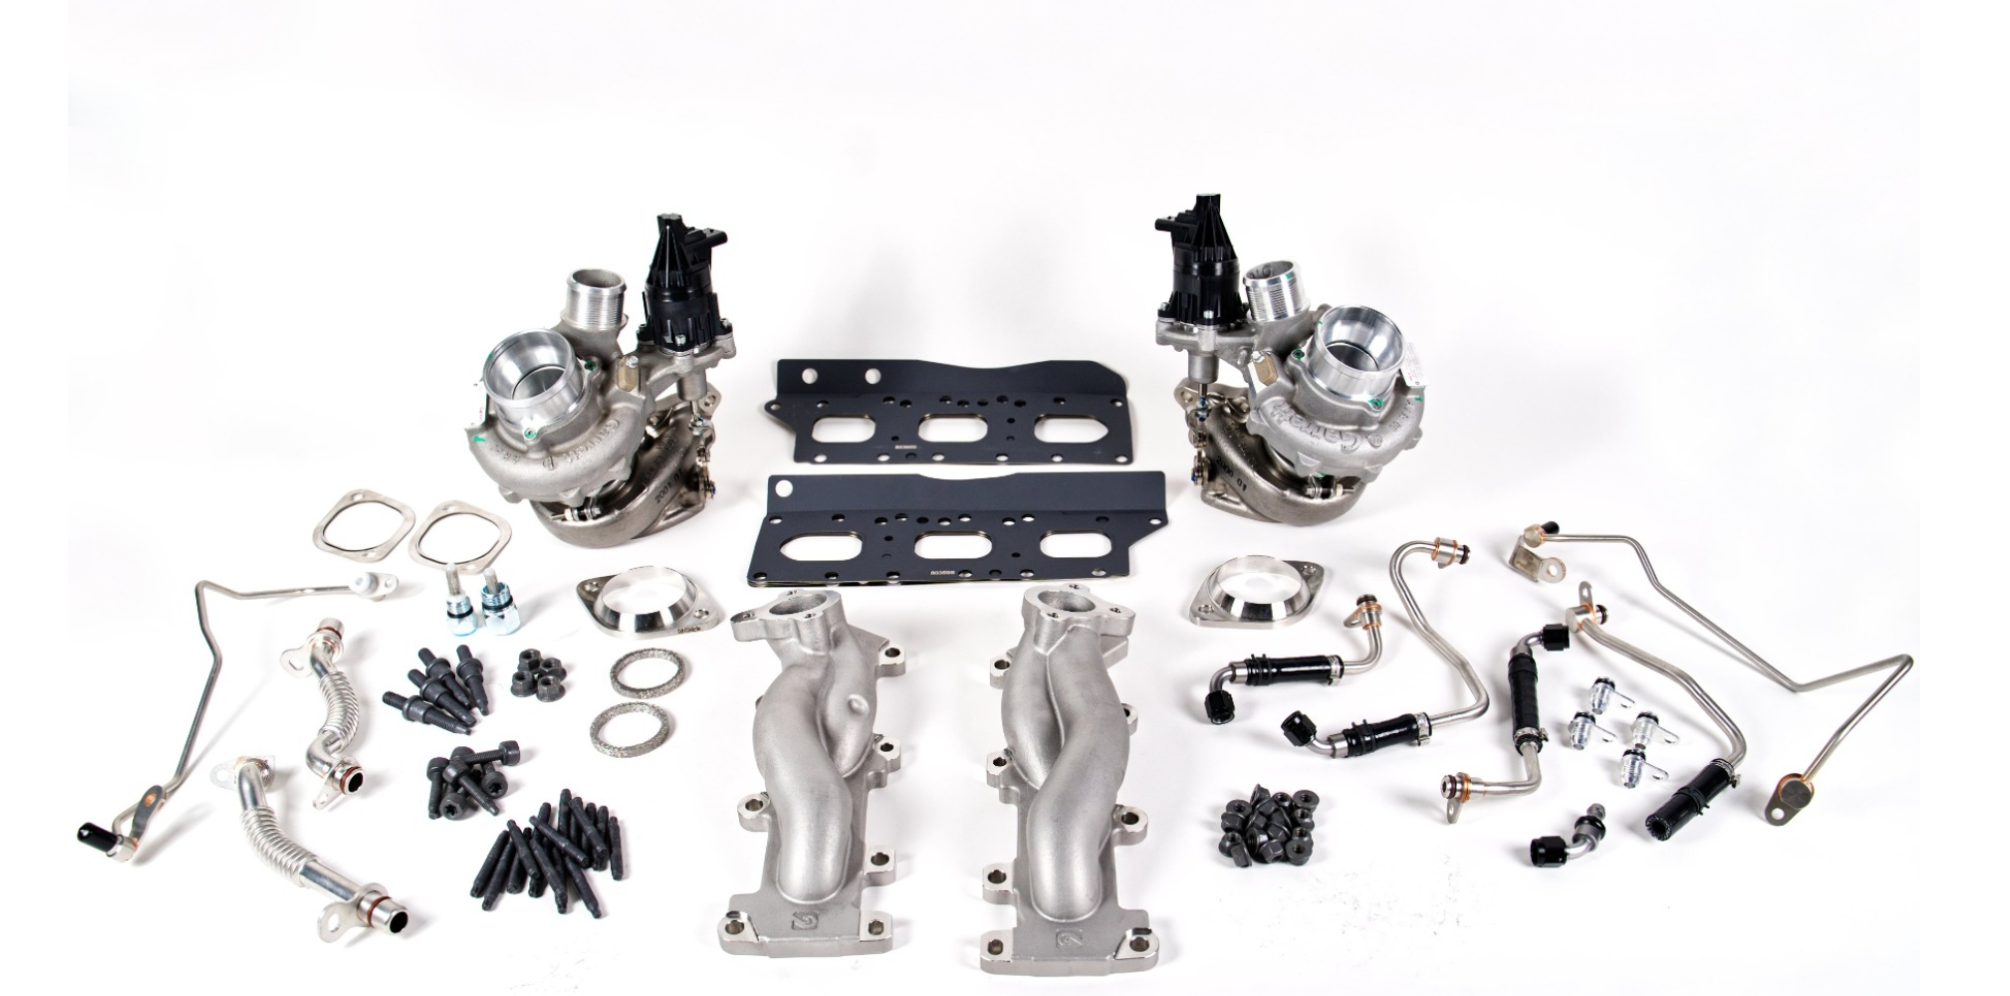
Watch out: a kit listed as fitting your model year may still be wrong for your engine code or turbo variant.
Common Mistakes: Missing Hardware, Reused Gaskets, and Loose Studs
Three mistakes cause most turbo install failures. Each is avoidable with a little discipline.
Missing hardware. Count every part against the checklist before the install starts. A missing O-ring discovered at midnight is a lost weekend.
Reused gaskets. Crushed gaskets do not reseal. Replace every exhaust and oil gasket on a turbo swap.
Loose or stretched studs. Reusing stretched studs causes the turbo to walk and the gasket to fail. Replace questionable hardware.
A fourth mistake deserves a mention: skipping the post-install leak check. After the first heat cycle, re-torque fasteners and inspect every joint. Boost leaks and oil seeps show up fast when you look for them.
Pick the Right Turbo Kit Hardware for Your Build
Hardware is not glamorous, but it is what keeps boost where it belongs. Match each gasket to its joint, replace stretched fasteners, prep oil and coolant lines, and verify fitment before you buy. Do that, and the install seals right the first time.
If you want a single source that ships the hardware together, we can help. Axion Performance Parts has supplied aftermarket performance parts since 2009. A complete EcoBoost twin turbo install kit shows what a full hardware package includes, from gaskets to AN coolant lines.
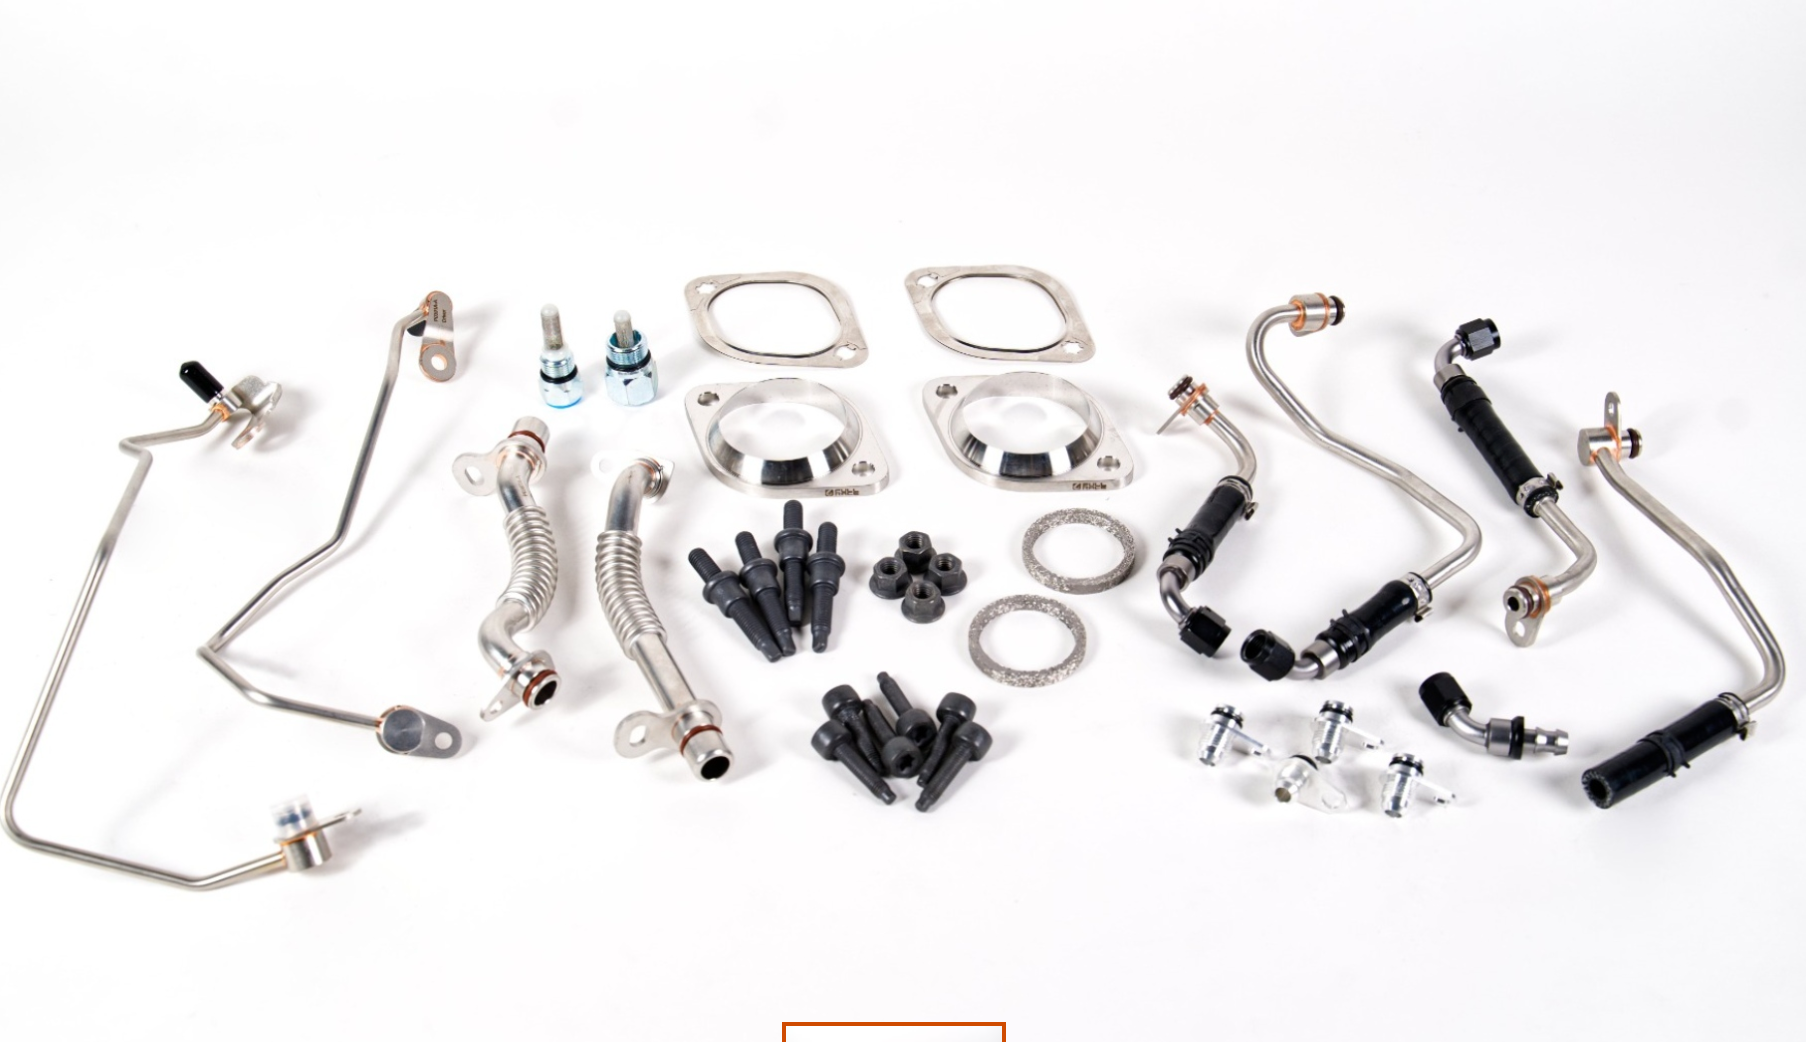
Get started with Axion Performance Parts and search our store for the gaskets, studs, and seals your build needs.
Hardware decides whether your turbo install holds boost or leaks it away. We stock the gaskets, fasteners, and fittings that seal each joint correctly, backed by technical support from people who build these cars. Get started with Axion Performance Parts and search our store for the right turbo kit hardware for your platform.
Frequently Asked Questions
Do you need new gaskets and bolts when installing a turbo?
Yes. Exhaust manifold, turbine outlet, and downpipe gaskets crush to seal once and lose that ability when reused. Studs and nuts stretch under heat cycling, so torque values no longer hold. A complete turbo kit hardware package, like the 2022-2026 Honda Civic 1.5T Turbo Gasket Kit at $87.15, consolidates the sealing components and hardware for a drop-in install. Reusing worn parts is the most common cause of post-install exhaust leaks and oil seepage.
What tools are needed to install a turbo kit?
Plan on a torque wrench rated for low values, a socket set with extensions, flare nut wrenches for oil and coolant lines, a pick and scraper for old gasket residue, and a thread chaser for stud holes. Add a magnetic tray for fasteners and nitrile gloves. For turbocharger installation tools, a stubby 10mm and 12mm wrench saves time on the turbine outlet. A breaker bar helps on rusted downpipe nuts before you start.
What supporting mods are needed for a turbo?
Beyond turbo kit hardware, you need supporting parts that keep the new turbo alive. An ECU tune or reflash matches fueling and boost targets to the turbocharger. A wideband O2 sensor confirms air-fuel ratios stay safe under boost. Check intercooler piping couplers and vacuum lines for cracks, and confirm the air filter flows enough for the new compressor. Skipping the tune after an upgraded turbo often triggers a check engine light and lean conditions.
Why should turbo oil feed and drain lines be checked during installation?
The oil feed line delivers pressurized oil to the turbo bearings, and the drain line returns it to the pan by gravity. A crushed copper crush washer or a kinked drain hose starves the bearings or floods the turbine housing with oil. Inspect both lines for cracks, replace every sealing ring, and confirm the drain has a continuous downward slope. Oil starvation is one of the fastest ways to destroy a new turbocharger.


